To see part one, about setting up the camera and capturing the images visit here.
Once the images have been taken off the camera you will have a folder bursting with hundreds, maybe even thousands of images, so the key to processing them is automation, we want the computer to do most of the work. So with that in mind, once the images have been taken off the camera the first thing to do is open them in Bridge.
Once the images have been taken off the camera you will have a folder bursting with hundreds, maybe even thousands of images, so the key to processing them is automation, we want the computer to do most of the work. So with that in mind, once the images have been taken off the camera the first thing to do is open them in Bridge.
 |
| The reason I'm using bridge is because of its direct communication with Camera Raw. Click on any image to see a larger version. |
Now we want to use the tools available in Camera Raw to bring out the best in the images. Ideally we want to use just one set of adjustments for all the images, as we don’t want them to suddenly change exposure, colour balance etc from one frame to the next.
So select an image and hit Ctrl+R to open up the Jpeg in Camera Raw without opening Photoshop, we don’t have need of it yet, and if your computer is a bit low on resources it helps to keep the memory hungry monster at bay.
Apply the adjustments, keeping in mind that they will be applied to all the photos in the folder. For example because my images were taken at sunset, I had pictures ranging from over exposed to under exposed, and while the basic recovery tools couldn’t perfectly correct every image in one go, I settled for doing as much as I could without overdoing either extreme.
 |
| Using the Recovery & Fill Light , or Blacks/Shades/Highlights/Whites sliders in later versions of ACR, helps to bring back some of the details in over or under exposed shots. |
Once exposure and colour corrections/enhancements have been made, click on done and when back in Bridge, highlight all the images, right click on one of them and go to Develop Settings – Previous Conversion. Then scroll thorough the images to make sure the adjustment hasn’t ruined any of them. If, for example the darker images have been pushed too far, go back into Camera Raw and back off some of the sliders, then return to Bridge and re-apply previous conversion, to see how it affects them.
Keep doing this until an overall satisfactory conversion has been achieved, it may take 2 or 3 goes depending on how wildly your images vary in exposure.
 |
| Applying a conversion to as many images as you have is as simple as a couple of mouse clicks. |
The next job is to get rid of any dust spots that have been captured with the image, from either the lens or the sensor. How long this takes will depend on how dirty your camera is, but the good news is, it only has to done to one image.
Select all the images and open in Camera Raw, hit B, this selects the Spot Removal brush, make sure it’s set to Heal, select the top image on the left hand stack, zoom in and work your way through it, getting rid of those dirty devils.
 |
| Above is just one image open in ACR, if multiple images were opened they would line up vertically on the left of the screen. |
Once the image is cleaned up press Ctrl+A to select all the images in Camera Raw, then hit the Synchronize button situated directly above them. Open the drop down Settings menu in the dialogue box and choose Spot Removal, then hit OK. All the images now have their dust spots removed.
 |
| We could have synchronised the previous exposure adjustments as well, but I find it better to apply it in Bridge, as it's easier to see the effects on the images. |
Once back in Bridge quickly scroll through the images just to make sure that the Spot Removal tool hasn’t made any glaringly obvious faux pas. When synchronising with this tool, it is not content aware, meaning it will place each Spot and corresponding source area in exactly the same place on every image.
Now Bridge is full of our original Jpgs but with the added goodness of Camera Raw adjustments, which means they now need to be saved, so the adjustments can be written in to the Jpg files, and they can be used in Movie Maker. At the moment they are just a set of instruction tagged to each Jpg which can’t be ‘seen’ by the video software, they need to be written into the Jpg itself to take effect.
This means opening the images in Photoshop and duly saving each file. Of course we are going to let the computer take the strain again. So in Bridge go to Tools – Photoshop – Image Processor.
 |
| Here's where the computer earns its dues, carrying out a tedious, repetitive task that would take an age if it was done manually. |
 |
| The settings are very straightforward. Just make sure to select all the images in Bridge or it will only process one. |
In the dialogue box, make sure Open first image to apply settings is unchecked, select a folder, then create a new folder, if you haven’t already, for your enhanced Jpgs to be saved in. Save as JPEG, quality 11 and then just press Run.
Depending on the speed of your computer and the number of images you have, you can now go and make a cup of coffee, or even learn the art of becoming a barista, and when you’re finished, the images will be processed.
Get rid of the original Jpgs, they are of no use to man nor beast, and open up Windows Movie Maker, if you don’t have it, you can download it here, for free. On the right hand side of the screen is the option to drag and drop your files, or open them from a folder, so find the folder your files are in, press Ctrl+A to select them all and then open or drag them into Movie Maker.
I won’t go into great detail here about all the tools available in the programme, mainly, and most importantly, because I don’t know much about them, I’ll just cover what I used for my videos. Firstly we want to set the timing of each image, so again, use Ctrl+A to select all the frames, then go to Video Tools Edit section in the top menu and find the Duration box.
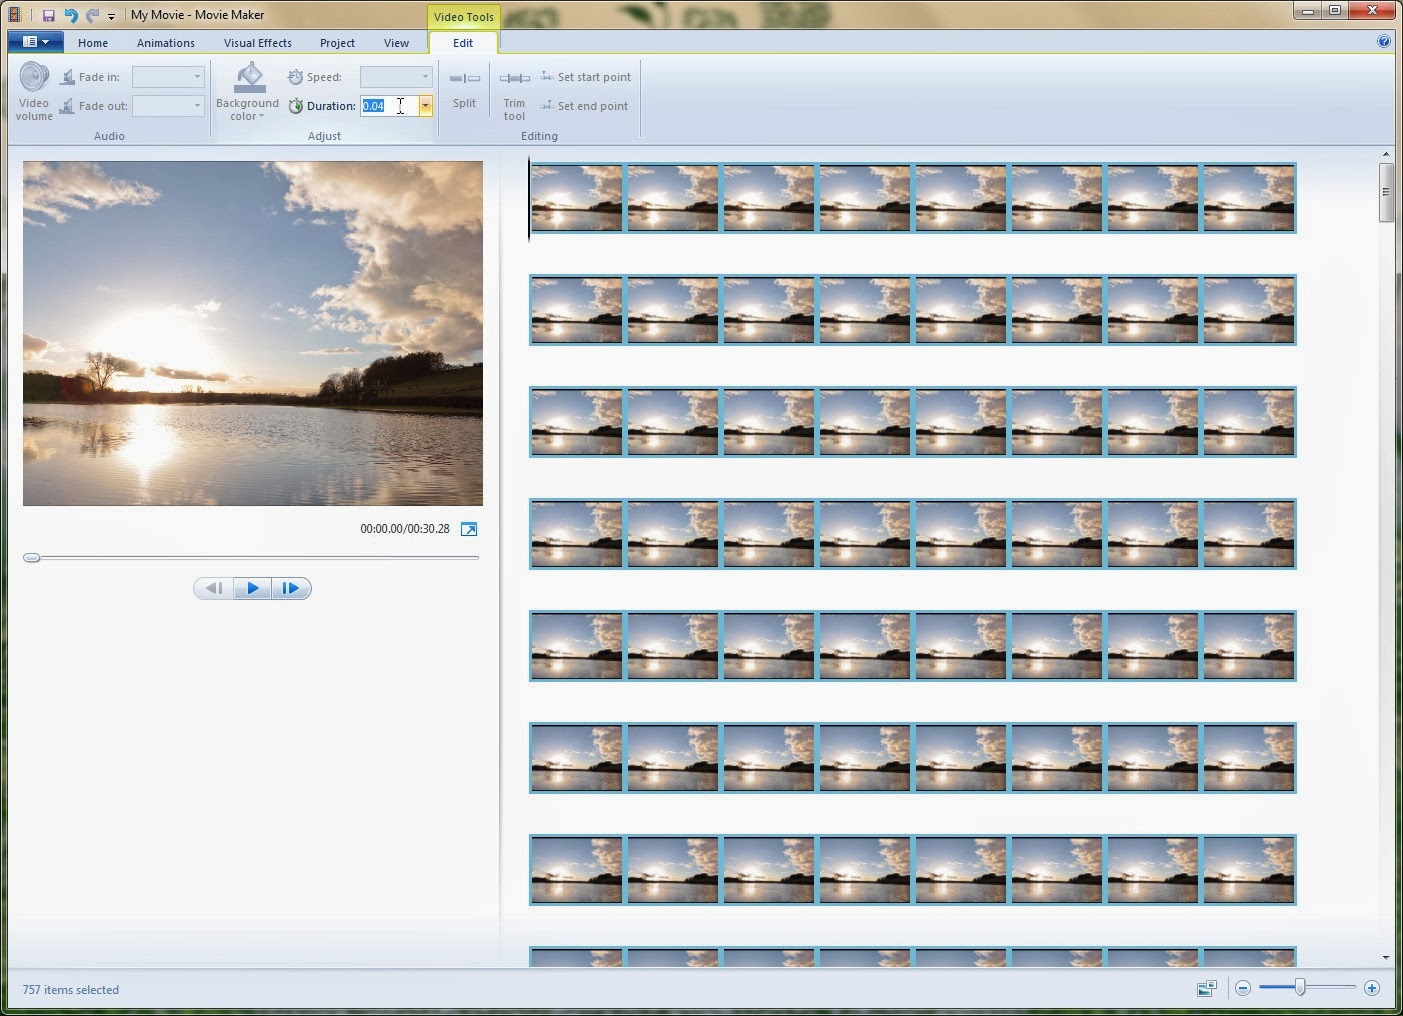 |
| Select the frame rate of each image to get a smooth looking playback. |
Set the frame rate to somewhere around 0.03 – 0.05 depending on the difference between each image. Once the frame rate has been changed play the video to see what it looks like, and if necessary increase or decrease the rate until you have a smooth looking video.
You can then, if you wish, set some visual effects. I tend to apply the Fade to Black option so the video, well, fades to black, at the end.
 |
| Selecting Fade to Black does exactly what it says it will. Well done that effect. |
You can also add music, either through the Free Music Archive, or select a piece of music online, for example freeplaymusic.com has a lot of tracks available to download and save to your computer.
 |
| Adding music makes a real difference to the finished video. |
Then it’s just a case of saving the movie and uploading to your preferred site, and the job is done.
 |
| Movie Maker gives you the option to save the video into various formats, for different devices, and very helpfully for different video sharing sites, like YouTube and Vimeo. |
Time Lapse Part 1
No comments:
Post a Comment